Track expenses by category
Rent, supplies, advertising — record what the work costs, and the Statistics tab turns revenue into profit.
Pro Updated Sep 18, 2026
Revenue is what clients pay; profit is what is left after the room, the products and the ads. Expenses are how the app knows the difference.
Steps
- On the Statistics tab, tap + and choose Add expense (on Android, open the Expenses card and tap +).
- Enter the Amount, pick a Category, set the Date. On Android there is a Note field as well.
- Save. The Expenses box on the dashboard updates, and Profit drops by the same amount.
Categories
- On iPhone, the expense form has a Category row that opens the categories screen; tap + there to add New Category. Rent, Supplies, Advertising is a good start.
- On Android, type the category on the expense; expenses without one are grouped as No category.
The expenses screen
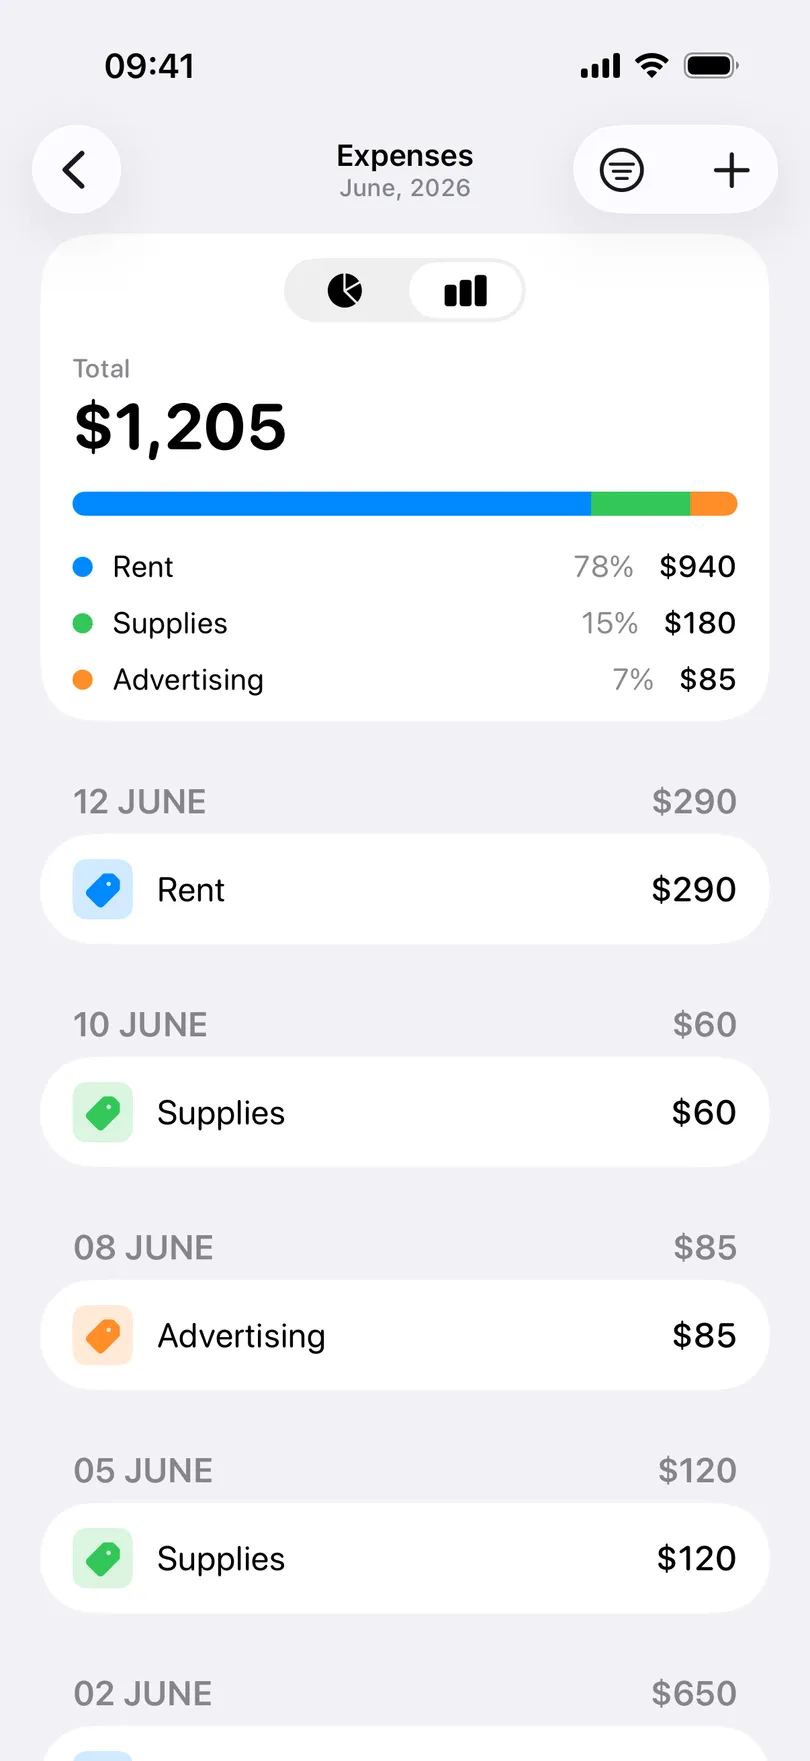
Open it from the Expenses box. The total for the period is on top with a bar showing each category’s share, then the expenses by date. Group them by date or category and sort by date or amount from the menu (iPhone); swipe left to delete (with Undo on Android).
Good to know
- Expenses follow the statistics period. Switch the period to last month and you see last month’s expenses.
- Expenses are not tied to an appointment. Materials for a specific visit are simply an expense on that day.
- Reports can include expenses per category — see Reports.
- Expense tracking is part of Pro. Anyone who recorded expenses before it became a Pro feature keeps access.
Related questions
See also
Didn’t find the answer? Ask support
My Clients 

Start organizing your clients today
Free No account Works offline